Agent workflows
Make a Remotion launch video from a reference-led brief
A practical Remotion launch-video workflow: select references, write a timed brief, prepare real product UI, use agent skills and review the rendered film.
By Refs · · 5 min read
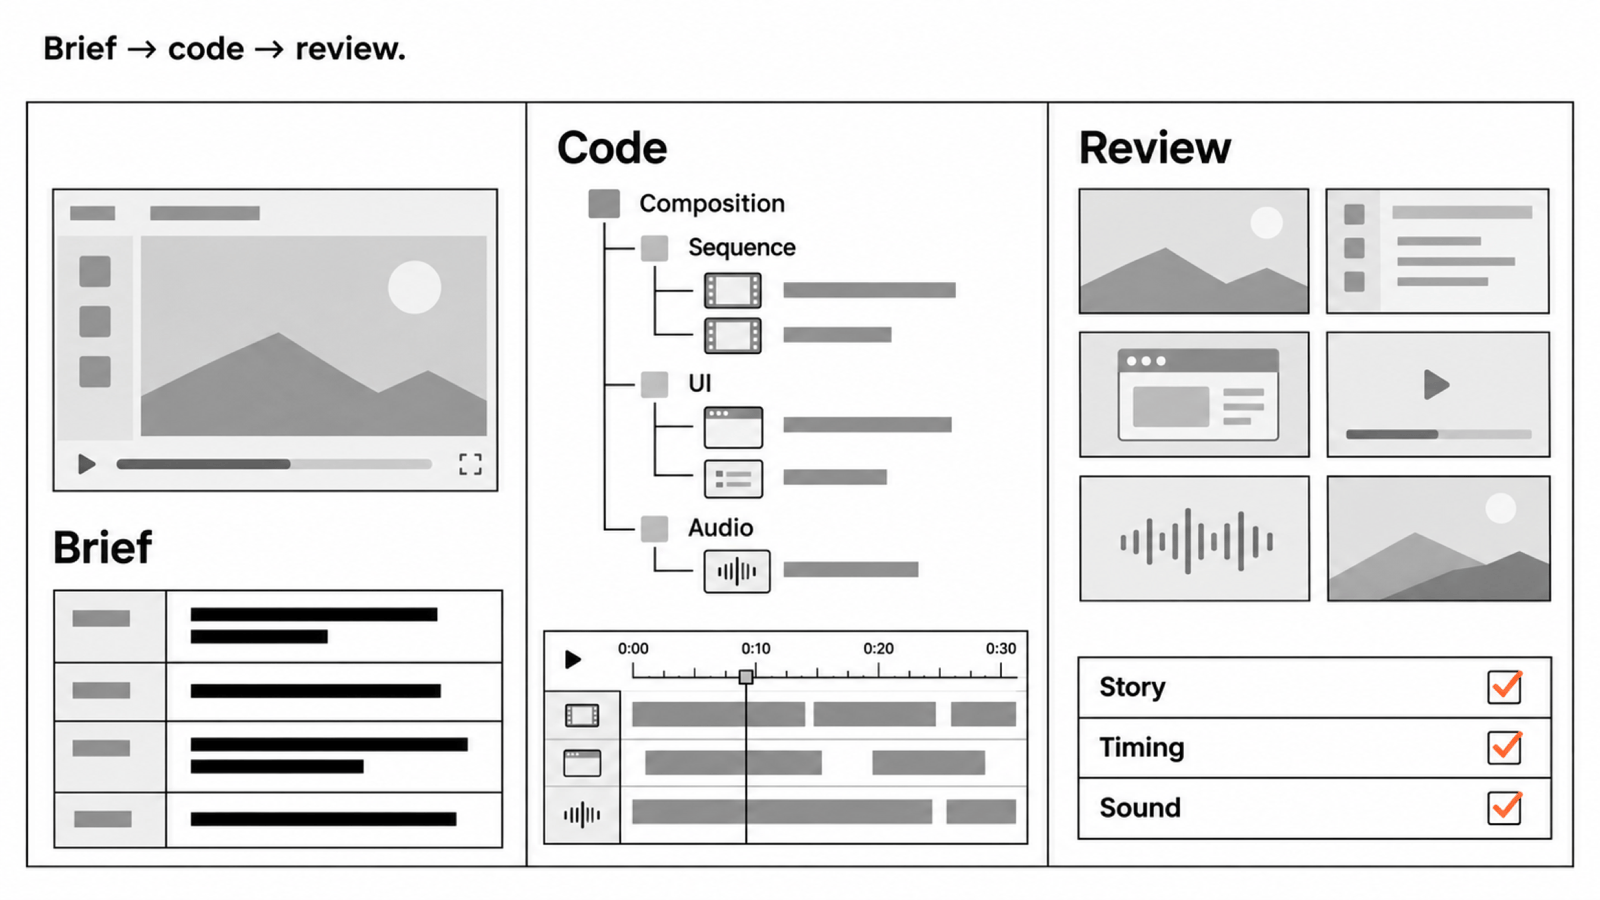
A Remotion launch video starts with the same decisions as any product film: what the audience should understand, what proves the claim and what belongs on screen. A coding agent can help implement the timeline, but it needs a concrete brief to work from.
This is a production workflow and prompt template. It does not claim that a particular prompt has been benchmarked or that every reference can be recreated in code.
Choose a reference that fits the production method
For a film built mainly from product UI, type and graphic elements, look for references with those same ingredients. Start with UI animation or kinetic typography. Record the exact beats you want to learn from.
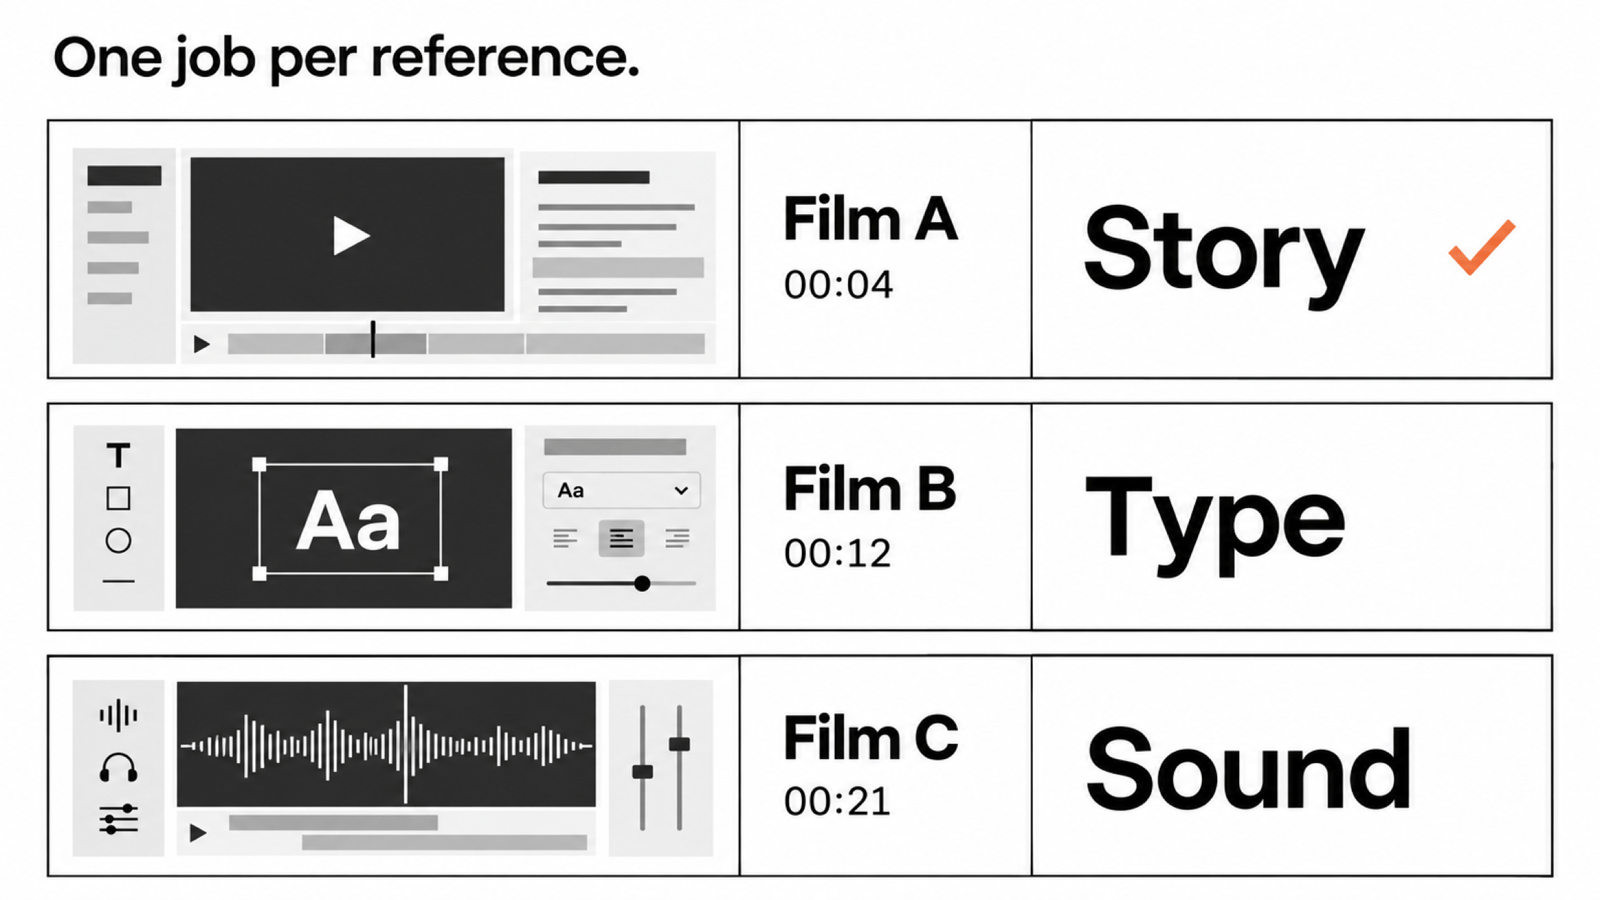
A film with physical camera footage or complex 3D may need additional tools and assets. Make that decision before asking the agent to reproduce its look. The reference selection guide explains how to assign one job to each reference.
Prepare the assets before generating scenes
Collect the approved logo, fonts, copy and product recordings in the project. Use safe example data. Capture enough context around each action to show what changed, then choose a crop that keeps the important control and result readable.
Write an asset list with file names and intended beats. Missing footage should be marked as missing. Ask the agent to report an absent asset rather than inventing a product screen or presenting an illustrative mockup as the real interface.
For music, voice and third-party footage, keep the usage rights alongside the assets. A reference soundtrack helps describe a musical role; it does not supply a licence.
Add the maintained Remotion guidance
Remotion publishes official agent skills for coding agents. Its documentation gives this installation command:
npx skills add remotion-dev/skills
Run it in the project where you intend to work and review the installation choices. For project creation and setup, follow the current Remotion documentation. Keep implementation guidance in the skill and creative decisions in your brief so the agent has both.
You can use the Refs MCP to bring reference research into the agent's workflow. A free Refs account is required for search; full blueprints, plans and storyboards require Pro. Follow the setup page for your client rather than copying an old authentication example.
Give the agent a timed brief
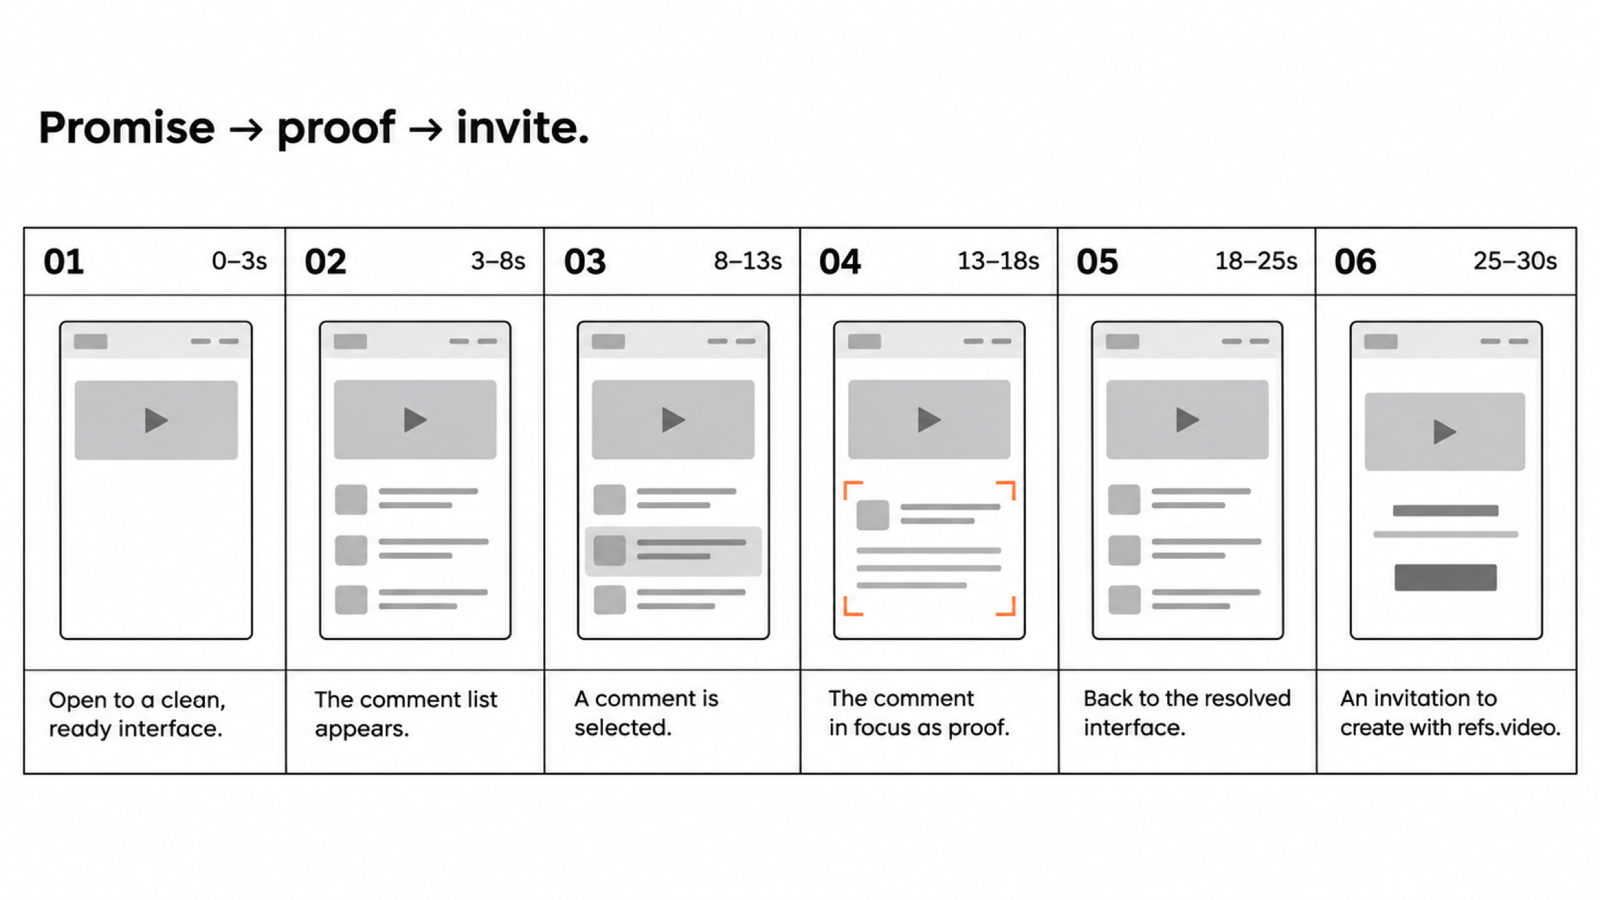
Finish a storyboard before building the full film. Specify the aspect ratio, duration, frame rate, exact copy, assets and the purpose of each scene.
Here is a starting prompt for a 30-second, landscape product film. Replace every bracketed field with your decisions:
Build a 30-second product launch film in this Remotion project.
Output: 1920x1080, 30 fps, 900 frames.

Audience: [who is watching]
Promise: [one sentence]
Proof: [the real product action and its visible result]

Read the project's installed Remotion skills.
Use the storyboard and asset list in [file paths].
Primary reference: [source link and measured beat notes].
Supporting reference: [source link, timestamp and one specific job].
Apply our own font, colours, logo and approved copy throughout.

First produce a scene plan with frame ranges and asset paths.
Flag missing assets and unclear timings before implementing.
Build one representative scene for review before the full film.
Make the product interaction readable at phone size.
Use the licensed audio files named in the asset list.

After rendering, report the output path, duration, dimensions
and any missing assets or unresolved differences from the brief.
The frame count is arithmetic: 30 seconds at 30 frames per second is 900 frames. It says nothing about how good the edit will feel. That still needs a playback review.
Approve a representative scene first
Choose the scene containing the main product action. It exposes the hardest decisions: UI readability, crop, type hierarchy, cursor movement and the pace of the interaction.
Render that scene and compare it to the reference notes. Check that the treatment belongs to your brand and the audience can follow the action. Resolve those questions before repeating the treatment across the rest of the timeline.
This is also the time to remove animation that competes with the proof. If a word appears while a cursor selects a control and the camera starts moving, decide which event deserves attention and stagger the others.
Check frames, playback and the export
Use still frames or a contact sheet to inspect alignment, text overflow and visual continuity. Watch the full exported file to assess pacing, transitions and sound. A successful render only confirms that the renderer produced a file.
Compare the reference and your export side by side at their intended speed. Does the reveal have enough setup? Is the product result visible for long enough? Does a sound cue land on the intended action? Write fixes as timestamped observations so the agent can make a bounded change.
Finally check the delivered file's dimensions, runtime, frame rate, text at phone size and audio ending. A vertical adaptation needs its own framing pass; centre-cropping a landscape product interaction can hide the controls that explain it.
What Refs adds to this workflow
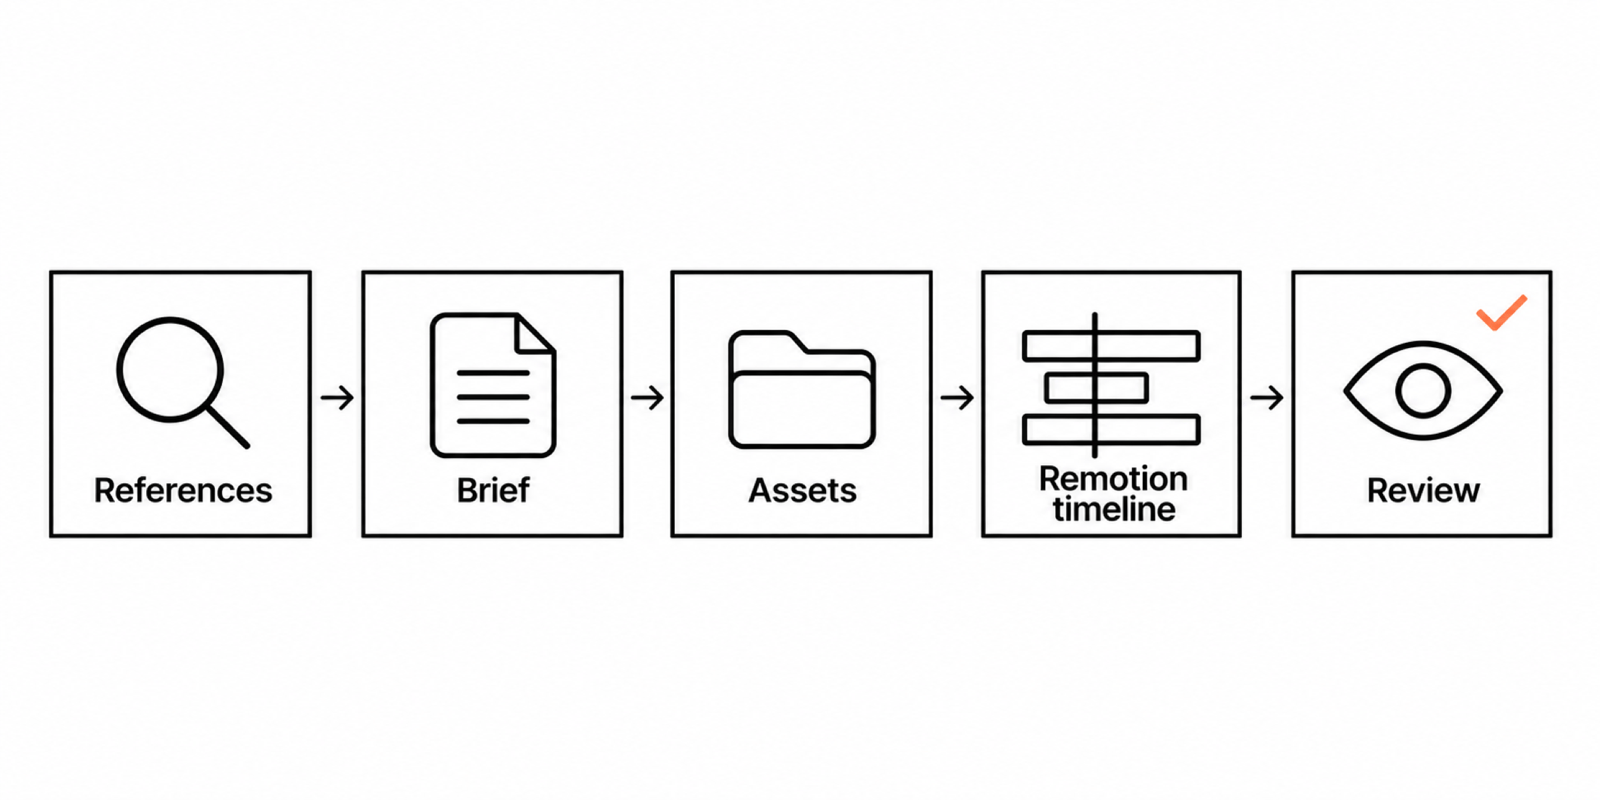
Refs supplies measured references and production analysis. Remotion supplies a way to implement a film in code. The handoff between them is the brief: source links, specific techniques, timed scenes and your product's real assets.
Browse the archive, choose a small reference set and write the story before asking for the full render. Keep the storyboard template beside the project so revisions stay tied to what the viewer needs to understand.